How do I determine the appropriate pressure rating for my fire check valves?

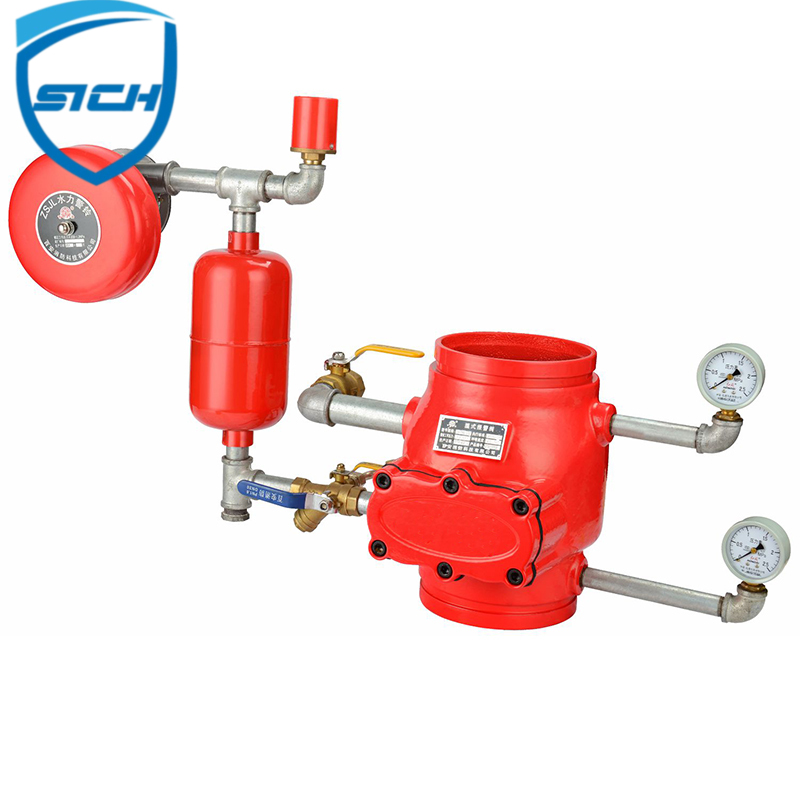
Fire check valves are specialized valves used in fire protection systems to prevent the reverse flow of water or other fire suppression agents. They are typically installed in the piping system between the water supply and the sprinkler or fire suppression system.

Here are some key features and considerations to keep in mind when selecting fire check valves:

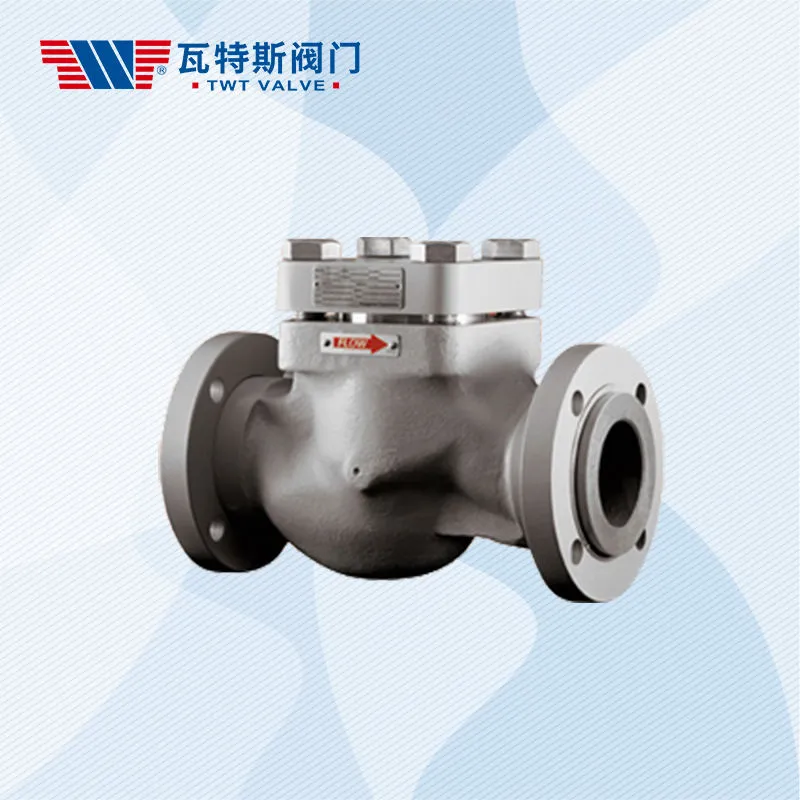
Type: Fire check valves are available in different types, including swing check valves, tilting disc check valves, and lift check valves. Each type has its own advantages and disadvantages, so it’s important to choose the type that best meets the needs of your fire protection system.

Size: Fire check valves come in different sizes and pressure ratings, so it’s important to choose the size that is appropriate for the flow rate and pressure of your system. The valve size should match the diameter of the piping system.

Material: Fire check valves can be made from different materials, such as cast iron, ductile iron, or bronze. Choose a material that is compatible with the other materials in your fire protection system and is resistant to corrosion and wear.

Certification: Look for fire check valves that are certified by recognized testing organizations, such as UL or FM Global. Certification ensures that the valves meet industry standards for safety and performance.

Service and support: Choose a supplier that provides excellent after-sales service, including installation, maintenance, and repair support. china fire check valves The supplier should have a team of experienced technicians and engineers who can provide technical assistance and troubleshooting as needed.

Some examples of fire check valve suppliers include Victaulic, Tyco, and Mueller. It’s important to research and evaluate different suppliers to find the one that best meets your specific needs and requirements.

Determining the appropriate pressure rating for your fire check valves is an important part of selecting the right valves for your fire protection system.

Here are some steps you can take to determine the appropriate pressure rating:

Determine the maximum pressure in your system: The pressure rating of your fire check valves should be equal to or greater than the maximum pressure in your fire protection system. This can be determined by consulting the system design or by measuring the pressure at various points in the system.

Consider the flow rate: The flow rate of water or other fire suppression agent through the system can also affect the pressure rating required for the fire check valves. Higher flow rates may require higher pressure ratings to maintain the required flow and pressure levels.

Check local codes and regulations: Local codes and regulations may specify minimum pressure ratings for fire check valves in specific applications. Be sure to check these requirements before selecting fire check valves for your system.

Consult with a professional: If you are unsure about the appropriate pressure rating for your fire check valves, consult with a professional, such as a fire protection engineer or a supplier of fire protection equipment. They can help you determine the appropriate pressure rating based on the specific requirements of your system.

By taking these steps, you can determine the appropriate pressure rating for your fire check valves and ensure that they meet the necessary safety and performance requirements for your fire protection system.

Hydraulic Cylinder Repair Guide and Tips

Here are some hydraulic cylinder repair guide and tips:

Identify the problem: Before starting any repairs, identify the problem with the hydraulic cylinder. Common issues include leaks, damage to seals or piston rods, and worn or damaged components.

Disassemble the cylinder: Once the problem has been identified, disassemble the hydraulic cylinder to gain access to the affected components. Be sure to follow the manufacturer’s instructions for disassembly and take care not to damage any components during the process.

Inspect the components: Once the hydraulic cylinder is disassembled, inspect the components for wear, damage, or other issues. This may involve measuring the size and shape of the piston, piston rod, and cylinder bore, and checking for corrosion or pitting.

Replace worn or damaged components: If any components are worn or damaged, replace them with new components that are the correct size and shape for the hydraulic cylinder.

Replace seals: If the seals are worn or damaged, replace them with new seals that are the correct size and shape for the hydraulic cylinder. Be sure to lubricate the new seals with hydraulic fluid before installing them.

Reassemble the cylinder: Once all repairs have been completed, reassemble the hydraulic cylinder using the manufacturer’s instructions. Take care to properly align all components and tighten all fasteners to the correct torque specifications.

Test the cylinder: Once the hydraulic cylinder is reassembled, test it to ensure that it is functioning properly. repacking hydraulic cylinder This may involve pressurizing the cylinder and checking for leaks, or checking the performance of the cylinder in the equipment it is installed in.

Regular maintenance: To prevent future issues with the hydraulic cylinder, perform regular maintenance, including cleaning, inspection, and lubrication.

Some additional tips for hydraulic cylinder repair include:

Use high-quality replacement parts that are designed for your specific hydraulic cylinder.
Use the correct tools and equipment for the repair job to prevent damage to the hydraulic cylinder or its components.
Follow all safety precautions when working with hydraulic systems, including using proper personal protective equipment and relieving pressure from the system before starting any repairs.
Consult with a professional hydraulic repair service if you are unsure about any aspect of the repair process.


What are some common maintenance tasks I should perform on my hydraulic cylinder?

Here are some common maintenance tasks you should perform on your hydraulic cylinder to ensure proper function and prevent wear and damage:

Clean the hydraulic cylinder: Regularly clean the hydraulic cylinder to remove any dirt, debris, or contaminants that can cause damage or affect performance. Use a non-corrosive cleaning agent and a soft cloth to wipe down the cylinder and its components.

Check hydraulic fluid levels: Check the hydraulic fluid levels regularly and top off as needed. Be sure to use the correct type of hydraulic fluid for your system and follow the manufacturer’s recommendations for fluid levels and replacement intervals.

Inspect seals and gaskets: Inspect the seals and gaskets on the hydraulic cylinder regularly for wear, damage, or leaks. Replace any damaged or worn seals or gaskets promptly to prevent leaks or further damage.

Lubricate moving parts: Lubricate the moving parts of the hydraulic cylinder regularly to prevent wear and ensure proper function. Use a high-quality lubricant that is compatible with your system and follow the manufacturer’s recommendations for lubrication intervals.

Check for leaks: Check the hydraulic cylinder regularly for leaks, including around the seals, gaskets, and fittings. Address any leaks promptly to prevent further damage or performance issues.

Inspect hydraulic hoses and fittings: Inspect the hydraulic hoses and fittings regularly for wear, damage, or leaks. Replace any damaged or worn hoses or fittings promptly to prevent leaks or further damage.

Test the hydraulic cylinder: Test the hydraulic cylinder periodically to ensure proper function and performance. This may involve pressurizing the cylinder and checking for leaks or checking the performance of the cylinder in the equipment it is installed in.

Overall, performing regular maintenance tasks on your hydraulic cylinder can help ensure proper function, prevent wear and damage, and prolong the life of the cylinder and its components. Be sure to follow the manufacturer’s recommendations for maintenance and consult with a professional hydraulic repair service if you are unsure about any aspect of hydraulic system maintenance or repair.

How do I determine the appropriate size and type of RPRV for my system?

To determine the appropriate size and type of Residual Pressure Retaining Valve (RPRV) for your system, you will need to consider several factors, including the size of the pipeline, the flow rate of the fluid, the pressure requirements, and the type of fluid being transported.

Here are the steps to determine the appropriate size and type of RPRV for your system:

Determine the size of the pipeline: The first step is to determine the size of the pipeline where the RPRV will be installed. This will typically be measured in inches or millimeters.

Calculate the flow rate: The next step is to calculate the flow rate of the fluid that will be flowing through the pipeline. This can be calculated based on the size of the pipe, the velocity of the fluid, and the density of the fluid.

Determine the pressure requirements: The pressure requirements of the system will depend on the type of fluid being transported and the specific application. It’s important to consult with a qualified engineer or valve supplier to determine the appropriate pressure requirements for your system.

Select the appropriate type of RPRV: There are several types of RPRVs available, including pilot-operated, direct-acting, and spring-loaded valves. The appropriate type of valve will depend on the specific requirements of your system, such as the pressure range and flow rate.

Select the appropriate size of RPRV: Once you have determined the flow rate and pressure requirements, you can select the appropriate size of RPRV. The valve should be sized to maintain a minimum residual pressure in the pipeline or system, and should be able to handle the maximum flow rate.

Consider additional features: Depending on the specific application, you may also need to consider additional features such as strainers or check valves to prevent clogging or backflow.

Overall, selecting the appropriate size and type of RPRV for your system requires consideration of several factors, including pipeline size, China non return valve suppliers flow rate, pressure requirements, and type of fluid being transported. It’s important to consult with a qualified engineer or valve supplier to ensure that the correct valve is selected for your specific application.

How do I determine the appropriate pressure range for my system?

Determining the appropriate pressure range for your system involves considering several factors, including the type of fluid being transported, the flow rate, and the specific application.

Here are some steps to determine the appropriate pressure range for your system:

Consult with a qualified engineer or valve supplier: It’s important to consult with a qualified engineer or valve supplier who is knowledgeable about the specific requirements of your system. They can help you determine the appropriate pressure range based on the type of fluid being transported, the flow rate, and the specific application.

Consider the operating conditions: The pressure range should be selected based on the operating conditions of the system, including the maximum and minimum pressure requirements, as well as the normal operating pressure. For example, if the system is subject to fluctuating pressure, the valve should be able to maintain a minimum residual pressure to prevent damage or collapse of the pipeline.

Consider the type of fluid being transported: The type of fluid being transported can also affect the appropriate pressure range. For example, if the fluid is corrosive or abrasive, the valve should be able to withstand the corrosive or abrasive conditions and maintain the appropriate pressure range.

Consider the specific application: The specific application can also affect the appropriate pressure range. For example, if the system is used for irrigation, the pressure range may be lower than for a water distribution network.

Overall, determining the appropriate pressure range for your system requires consideration of several factors, including the type of fluid being transported, the flow rate, and the specific application. It’s important to consult with a qualified engineer or valve supplier to ensure that the correct valve is selected for your specific application.

What are some tips for maintaining good hygiene while using adult diapers?

Maintaining good hygiene is important when using adult diapers to prevent skin irritation, infections, and other complications.

Here are some tips for maintaining good hygiene while using adult diapers:

Change the diaper regularly: It’s important to change the diaper regularly, at least every four to six hours, or as needed. Leaving a wet or soiled diaper on for too long can increase the risk of skin irritation and infection.

Clean the skin: Before putting on a new diaper, clean the skin thoroughly with warm water and a mild soap. Pat the skin dry with a soft towel, being careful not to rub too hard.

Use a barrier cream: If the skin is prone to irritation, apply a barrier cream or ointment to protect the skin from moisture and irritation.

Check for leaks: Check the diaper regularly for leaks or signs of saturation. If the diaper is wet or soiled, change it immediately to prevent skin irritation or infection.

Wash your hands: Always wash your hands thoroughly with soap and water before and after changing a diaper to prevent the spread of germs and bacteria.

Dispose of the diaper properly: After removing a soiled diaper, fold it up and dispose of it in a trash can with a lid to prevent odors and the spread of germs.

Maintain good overall hygiene: In addition to these specific tips for using adult diapers, it’s also important to maintain good overall hygiene practices, china adult diaper such as showering or bathing regularly, wearing clean clothing, and practicing good oral hygiene.

By following these tips for maintaining good hygiene while using adult diapers, it’s possible to prevent skin irritation and infection, and maintain good overall health and well-being.

What are some common signs of skin irritation or infection that I should look out for?

When using adult diapers, it’s important to watch out for signs of skin irritation or infection.

Here are some common signs to look out for:

Redness: Redness around the genital area or buttocks can be a sign of skin irritation or inflammation.

Itching: Itching or a burning sensation around the genital area or buttocks can be a sign of skin irritation or a yeast infection.

Rash: A rash that appears as small red bumps or patches can be a sign of skin irritation or a fungal infection.

Pain: Pain or discomfort around the genital area or buttocks can be a sign of skin irritation or a bacterial infection.

Odor: A strong odor from the genital area or diaper can be a sign of a bacterial infection.

Discharge: Discharge from the genital area can be a sign of a yeast or bacterial infection.

If you notice any of these signs, it’s important to seek medical attention as soon as possible. Your healthcare provider can help to diagnose the cause of the skin irritation or infection and recommend appropriate treatment, such as topical creams, antibiotics, or antifungal medications. In addition to seeking medical attention, it’s important to maintain good hygiene practices, such as changing the diaper regularly and cleaning the skin thoroughly, to prevent further irritation or infection.

How can I ensure adequate lighting and ventilation?

Ensuring adequate lighting and ventilation in a workstation is important for the comfort, health, and productivity of the users.

Here are some tips to ensure adequate lighting and ventilation:

Lighting: Adequate lighting is essential for a comfortable and productive workspace. Consider the following when selecting lighting for your workstation:
Natural light: Whenever possible, incorporate natural light into the workspace. Natural light can help improve mood and reduce eye strain.
Artificial light: Select artificial lighting that is bright enough to provide adequate illumination but not too bright that it causes glare or eye strain. workstation for 4 persons Use task lighting to provide additional lighting for specific tasks.
Light direction: Consider the direction of the lighting to avoid casting shadows or creating uneven lighting.
Ventilation: Good ventilation is essential to maintain air quality and reduce the risk of health issues. Consider the following when designing ventilation for your workstation:
Airflow: Ensure that there is good airflow in the workspace. Use fans and air purifiers if necessary to improve air circulation.
Temperature: Maintain a comfortable temperature in the workspace. The recommended temperature range for an office is between 68-76 degrees Fahrenheit (20-24 degrees Celsius).
Humidity: Maintain a comfortable level of humidity in the workspace. The recommended range for humidity is between 30-60%.
Maintenance: Regularly maintain the lighting and ventilation systems to ensure that they are functioning properly. Clean air filters, replace bulbs, and repair any damaged equipment as needed.
By following these tips, you can ensure that your workstation has adequate lighting and ventilation to promote comfort, health, and productivity.

How can I improve air circulation in my workspace?

Improving air circulation in your workspace is important for maintaining good air quality and reducing the risk of health issues.

Here are some tips to improve air circulation in your workspace:

Open windows and doors: Opening windows and doors can help improve air circulation by allowing fresh air to enter the workspace and stale air to exit.

Use fans: Use fans to improve air circulation in the workspace. Ceiling fans and floor fans can help improve air circulation and keep the workspace cool.

Use air purifiers: Air purifiers can help improve air quality by removing pollutants and allergens from the air. They are especially helpful for those with allergies or respiratory issues.

Rearrange furniture: Rearrange furniture to improve air circulation. Ensure that furniture is not blocking air vents or windows and that there is enough space for air to circulate.

Keep the workspace clean: Dust, dirt, and other debris can reduce air circulation and contribute to poor air quality. Keep the workspace clean by regularly dusting, vacuuming, and wiping down surfaces.

Use natural ventilation: Natural ventilation is an effective way to improve air circulation. Consider using natural ventilation by opening windows and doors, using window vents, or installing skylights.

By following these tips, you can improve air circulation in your workspace and promote better air quality. It’s important to maintain good air quality to reduce the risk of health issues and promote comfort and productivity.

What are some factors to consider when selecting the right Cooper split bearing for an application?

When selecting the right Cooper split bearing for an application, there are several factors to consider.

Here are some of the key factors to keep in mind:

Load requirements: The load requirements of the application will determine the size and type of bearing needed. It’s important to select a bearing that can handle the anticipated radial and axial loads.

Speed requirements: The speed requirements of the application will determine the type of bearing needed. Spherical roller bearings are typically used for high-speed applications, while cylindrical roller bearings are better suited for lower speeds.

Environmental factors: Environmental factors such as temperature, humidity, and exposure to corrosive substances can affect the performance of the bearing. It’s important to select a bearing that is designed for the specific environmental conditions of the application.

Shaft size and alignment: The size and alignment of the shaft will affect the type and size of bearing needed. It’s important to select a bearing that is properly matched to the shaft size and alignment.

Lubrication requirements: The lubrication requirements of the application will impact the type of bearing needed. It’s important to select a bearing that is compatible with the lubrication system used in the application.

Maintenance requirements: The maintenance requirements of the application will impact the type of bearing needed. Cooper split bearings are designed to simplify maintenance, but it’s still important to select a bearing that is appropriate for the level of maintenance required.

By considering these factors when selecting a Cooper split bearing, you can ensure that you are selecting the right bearing for the specific application. cooper split bearings It’s important to work with a reputable manufacturer and seek expert advice if needed to ensure that the bearing is properly matched to the application requirements.

How can I determine the appropriate size and type of bearing for my application?

Determining the appropriate size and type of bearing for your application requires careful consideration of several factors.

Here are the steps you can follow to determine the appropriate size and type of bearing:

Determine the load requirements: The first step is to determine the radial and axial loads that the bearing will need to support. This will help you select a bearing that is appropriately sized to handle the load requirements of the application.

Determine the speed requirements: The speed requirements of the application will determine the type of bearing needed. Spherical roller bearings are typically used for high-speed applications, while cylindrical roller bearings are better suited for lower speeds.

Determine the shaft size and alignment: The size and alignment of the shaft will affect the type and size of bearing needed. It’s important to select a bearing that is properly matched to the shaft size and alignment.

Consider environmental factors: Environmental factors such as temperature, humidity, and exposure to corrosive substances can affect the performance of the bearing. It’s important to select a bearing that is designed for the specific environmental conditions of the application.

Consider lubrication requirements: The lubrication requirements of the application will impact the type of bearing needed. It’s important to select a bearing that is compatible with the lubrication system used in the application.

Consult with a bearing expert: If you are unsure about the appropriate size and type of bearing for your application, it’s important to consult with a bearing expert. They can help you select the right bearing for your specific application requirements.

By considering these factors and following these steps, you can determine the appropriate size and type of bearing for your application. It’s important to work with a reputable manufacturer and seek expert advice if needed to ensure that the bearing is properly sized and selected for your specific application.

What is the typical High Strength 50mm Calcium Silicate Board?

Calcium silicate board is a type of insulating material made from calcium silicates and cellulose fibers. It has good strength, fire resistance, and acoustic insulation properties. Typical properties of a high strength 50 mm calcium silicate board would be:

Density: 400-500 kg/m3

Compressive strength: 450-1200 kPa

Flexural strength: 1.5-2.0 MPa

Thermal conductivity: 0.05-0.08 W/mK (at 10°C mean temp.)

Maximum service temperature: 650-800°C

Water absorption: <5%

Fire resistance: Non-combustible, A1 Euroclass fire rating

The high strength is achieved through:

Higher density

Higher density boards have more calcium silicate and less cellulose fibers, resulting in higher strength.

Smaller pore size

Smaller pores are formed during manufacturing which improves the compressive and flexural strength.

Higher percentage of calcium silicate

More of the stronger calcium silicate component increases the strength of the board.

Other properties like low thermal conductivity, fire resistance and acoustic insulation usually remain similar to regular (lower strength) calcium silicate boards. The main advantages of the high strength boards are:

Suitable for load bearing applications

Easier to handle and install

Withstand impact and vibration better

Thinner sections can be used for the same application

What are some common cleansing agents used in wet wipes?

A wet wipes production line consists of several machines and processes that are used to manufacture wet wipes in large quantities.

Here are some of the key components of a typical wet wipes production line:

Unwinding machine: This machine is used to unwind the raw material, typically a roll of non-woven fabric, that will be used to make the wipes.

Folding machine: The non-woven fabric is then fed through a folding machine, which folds the fabric into the desired size and shape for the wipes.

Cutting machine: The folded fabric is then fed through a cutting machine, which cuts the fabric into individual wipes.

Wetting station: The individual wipes are then fed through a wetting station, where they are saturated with a solution of water, cleansing agents, and other ingredients.

Sealing machine: After the wipes are wetted, they are then sealed into individual packages using a sealing machine.

Labeling and packaging machine: Once the individual packages are sealed, they are then labeled with product information and packaged into larger boxes or cartons for shipping.

Depending on the specific needs of the manufacturer, there may be additional machines or processes involved in the production line, such as quality control and testing equipment, or additional stations for adding fragrances or other ingredients to the solution used to wet the wipes.

It’s important to note that the production of wet wipes can have significant environmental impacts, including waste generation and pollution. wet wipes production line As such, it’s important for manufacturers to use sustainable practices and materials wherever possible, and for consumers to dispose of wet wipes responsibly.

The cleansing agents used in wet wipes can vary depending on their intended use and the manufacturer’s preferences.

Here are some common cleansing agents used in wet wipes:

Water: Water is often used as the main ingredient in wet wipes, as it is a natural and effective way to clean and refresh the skin.

Surfactants: Surfactants are chemicals that help to break down dirt and oil on the skin. They are commonly used in wet wipes to help remove dirt and impurities.

Emollients: Emollients are moisturizing agents that help to keep the skin hydrated and prevent dryness. They are often added to wet wipes to help keep the skin soft and smooth.

Preservatives: Preservatives are added to wet wipes to prevent the growth of bacteria and other microorganisms that can cause spoilage or contamination.

Fragrances: Fragrances are added to some wet wipes to provide a pleasant scent. However, they can also cause skin irritation in some people, so fragrance-free options are also available.

It’s important to note that some cleansing agents used in wet wipes can be harsh or irritating to the skin, especially for people with sensitive skin. As such, it’s important to choose wet wipes that are appropriate for your skin type and to use them according to the manufacturer’s instructions. If you experience any skin irritation or other issues, it’s best to discontinue use and consult a healthcare professional.

What are some common tools used for leather patches projects?

Some essential tools used for leather patch projects include:

Leather patches

Of course, leather patches are the main material you’ll need for leather patch projects! Look for high quality leather patches in various thicknesses, sizes and styles.

Leather awls

Leather awls are used to punch holes in leather for stitching. They come in different sizes based on the thickness of leather you’ll be working with.

Stitching needles

Choose needles with a large eye or shank to fit your stitching waxed thread. Larger needles, like saddle needles, work well for thicker leather.

Waxed thread

Waxed thread is designed specifically for stitching leather. It’s waxed to help it glide through the leather more easily. Thread for saddle stitching and patch stitching is typically size 0.5mm to 2.0mm thick.

Stitching mallet

A small mallet or hammer can be useful for pounding stitching into place after it’s threaded through the leather. This helps the stitching sit flat and the knot to tighten securely.

awls or prick punches

For punching small holes or indenting the surface of the leather, small awls or prick punches are useful. These make small holes that can then be widened with an awl or needle.

Scissors

Thick craft scissors with sharp, heavy blades work well for cutting leather patches and stitching threads. Be very careful cutting leather, as the edges can be sharp.

Leather stitching chisels

For heavy-duty stitching and projects, leather stitching chisels can be used. These are essentially small chisels with a sharpened edge for cutting through thick leather. They require a mallet for pounding.

Whip stitching twine

For oversewing edges or reinforcing stitching lines, whip stitching twine works well. It’s very thick waxed twine, typically cotton.

Punches

Various hole punches can be used to punch rounded or shaped holes in leather for decorating patches or attaching fittings like snaps, buckles or D-rings.

Sandpaper

Sandpaper in various grits is useful for sanding edges, roughing up surfaces and shaping leather patches. Finer grits can be used for finishing surfaces.

What are some good options for tie rod?

Tie rod factory supply some good options for tie rod ends include:

Moog

Moog is a top tier brand that makes high quality tie rod ends. Their tie rod ends typically start around $20-40 each. Some good, affordable models are the Moog KS10324 and KS10339. These are premium tie rod ends made with stamped steel construction and durable urethane bushings.

Raybestos

Raybestos is another reputable brand that makes premium tie rod ends. Their basic models start around $25-50 each. Some good options are the Raybestos RBT5112DPX and QXM 12. These provide durable, leak-proof performance with premium rubber bushings and grease fittings.

Vibrant Performance

Vibrant Performance is a well-rated brand that offers high performance and budget-friendly tie rod ends. Their basic models start around $15-30 each. Good options include the VIB 1641 and VIB 1643. These use high-pressure die-cast housings and premium rubber bushings for a smooth, tight ride.

Duralast

Duralast is a popular and affordable aftermarket automotive brand. They offer basic tie rod ends starting at $10-20 each. Some good affordable models are the Duralast DOT21 and Duralast PLATINUM. These provide durable steel construction and rugged rubber bushings at a very budget-friendly price.

Off-brand/OEM

You can also choose basic off-brand tie rod ends, often OEM replacement quality, for around $10-20 each. The brands, materials, and quality can vary more though. Only suitable if you’re on a tight budget.

Some other factors to consider:

Housing material

stamped steel, high pressure die cast – castings tend to be more durable.

Bushing type

rubber, urethane – urethane usually lasts longer but rubber is cheaper.

Grease vs sealed

grease fittings allow re-greasing but sealed units are lower maintenance. Either can work well.

Quality vs budget

premium brands use higher quality components for a smoother, tighter ride but budget options will work for normal driving needs.